|
|
 |
|
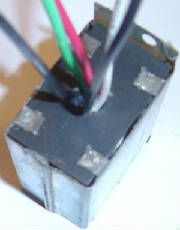
Metal "Blocks" containing
multiple capacitors, generally bypass capacitors, are common to 1930s' Philcos. Restoring these is fairly straightforward
with several similiarities to restoring Bakelite capacitors.
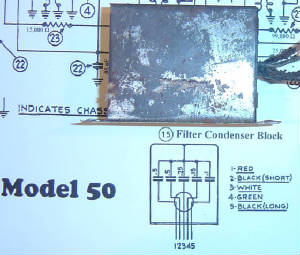
| A Filter "Condenser" Block |
|
| a.k.a. a box full, in this case, of 5 capacitors |
|
|
|
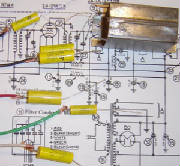
| Step 1. Secure a schematic and wiring diagram. |
|
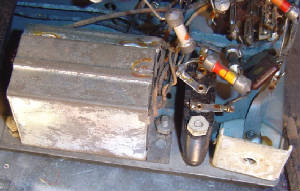
| Step 2. Remove the component. |
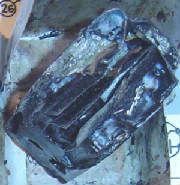
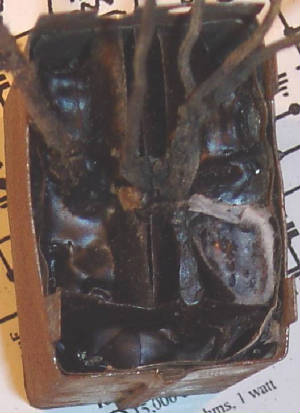
| Step 3. Remove the old capacitors. |
|
| (A solid block of a hard tar-like & foil mass.) |
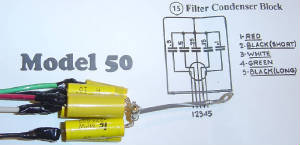
| Step 5. Assemble the new capacitor kit. |
|
| (soldier in new leads and insulate with tape) |
| Step 7. The component is reassembled |
|
| (front view) |
|
|
|
|
|
|
|
| Inside View - Note the Capacitor "Sections" |
|
| The Same Hard Tar Substance in the Bakelite Caps. |
| Step 4. Procure new caps. and wire the new leads |
|
| (note 2 caps. in parallel - hover the pic. for ?) |
| Step 6. The kit is installed into the old shell, |

|
| the cavity is filled with hot glue. |
| The Finished Component |

|
| (note the new grounding lug at the left bolt hole) |
|
|
|
|
|
|
Of note, these capacitor blocks generally have a single, common, ground.
The glue fill is probably not necessary. I prefer it to keep the new caps from "knocking-around"
during final assembly.
This component restoration required approximately two hours and four dollars to conduct.
|
|
|
|